How to resize Images (photos)
In this tutorial, we’ll learn how to resize images.
Start the program.
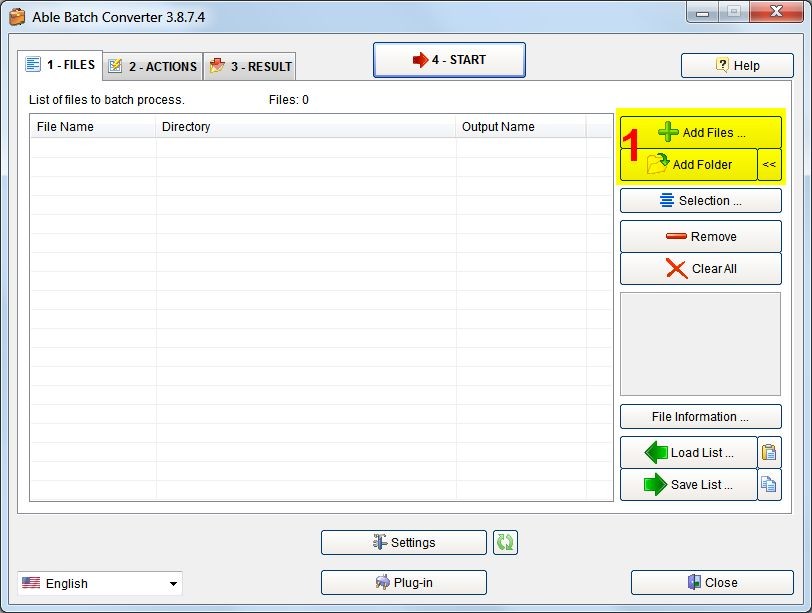
1) Click the FILES tab.
Click Add Files or Add Folder.
Add Files:
This will open the Open Files dialog box.
Select the images to be converted, then click the Open button.
This will add selected files to the List of files.
Add Folder:
This will open the Browse for Folder dialog box.
Select required folders to be converted, then click the OK button.
This will add all files from these folders to the List of files.
2) Click the ACTIONS tab.
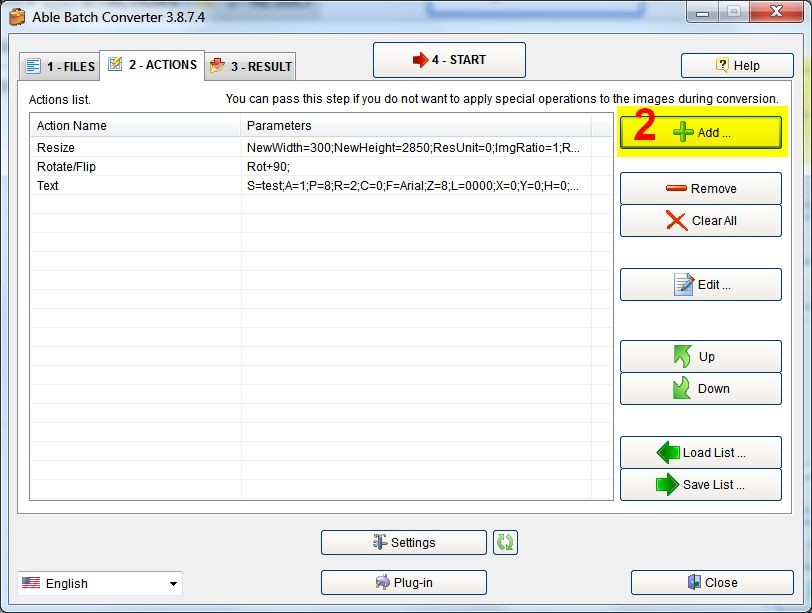
Click Add and select Resize action.
This action resizes the current image. The content of the image changes (stretched to new size).
New size tab.
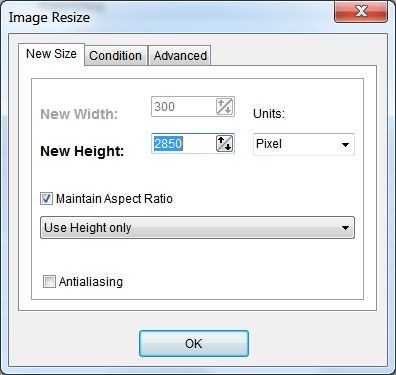
New Width, and New Height are values, in selected Units, of the new size.
Select the Maintain aspect ratio check box so that the resized picture will have the same aspect ratio as the original picture.
If the Maintain aspect ratio check box is selected, you only need to enter the horizontal value (width) or vertical value (height). The other value is updated automatically.
Use Width and Height
Resizes the image within the specified width and height. The width and height are resized as close to the specified value as possible while maintaining the aspect ratio.
Use Width only
Resizes the width to the specified value and resizes the height to whatever value is necessary to maintain the aspect ratio.
Use Height only
Resizes the height to the specified value and resizes the width to whatever value is necessary to maintain the aspect ratio.
Condition tab.

You can use the Condition tab to set required condition (if larger than, if smaller than, if landscape mode, if portrait mode etc.).
Advanced tab.
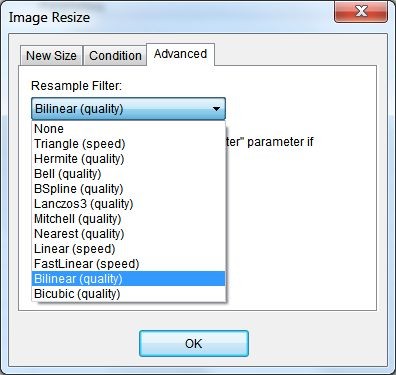
You can select resampling interpolation algorithm – Resample filter.
Some filters are a little bit faster but they also produce not so great quality. Others use extremely complex mathematics to obtain better quality. Of course these ones are slower.
3) Click the RESULT tab.
Output folder.
You need to decide where you want the files to be placed after converting.
If you want the images to be placed in the same folder you loaded them from, click The same as input folder check-box.
If you want to put them in a different folder, click the Browse button, and navigate to where you want them placed (fig. 3-a).
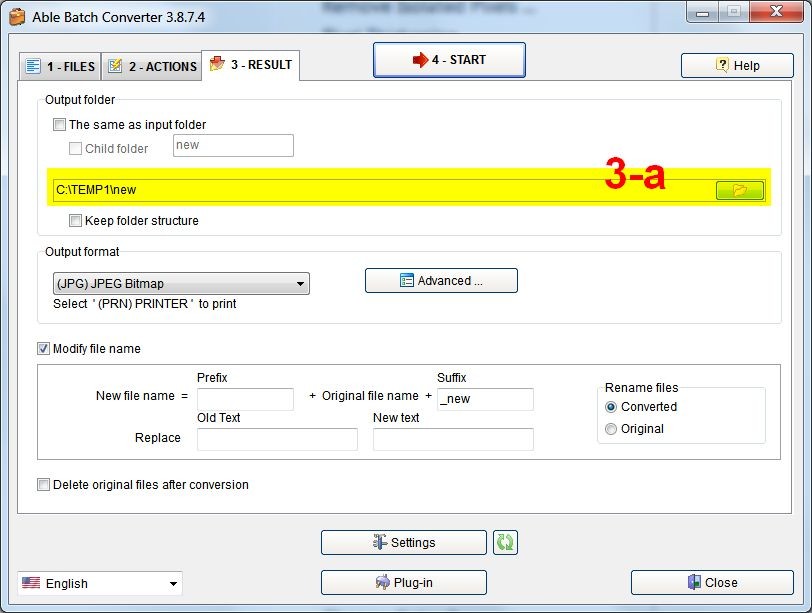
Use the drop down list to select the Output format.
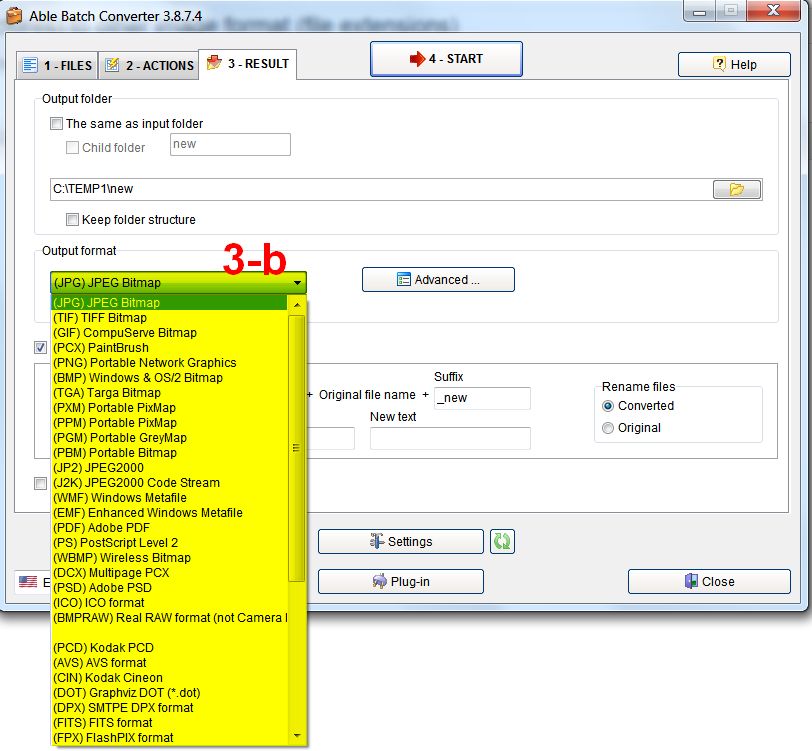
Clicking the Advanced button, will open the Settings dialog box (with specific parameters for each format).
4) If everything is set the way you want it, click Start.
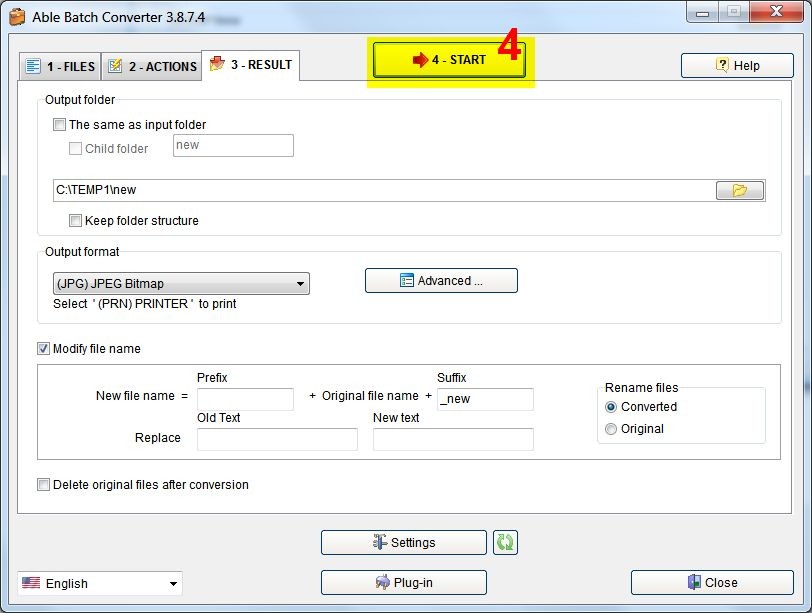
FILES tab will open, showing the files being processed.
When it’s finished, click the Exit button, and close Able Batch Converter.
Now you can navigate to the folder you chose for the output folder, and if everything went the way it’s supposed to, your resized images should be there.
Video tutorial:
Download Trial version
You can download evaluation versions of our products and try it free for 30 days.

(EXE, 20 MB) |
(ZIP, 19 MB) |